
react-final-form

NodeJs-Cucumber-Selenium


| react-final-form | NodeJs-Cucumber-Selenium | |
|---|---|---|
| 1 | 100 | |
| 6,889 | 20 | |
| - | - | |
| 6.6 | 0.0 | |
| about 2 years ago | almost 2 years ago | |
| JavaScript | JavaScript | |
| MIT License | - |
Stars - the number of stars that a project has on GitHub. Growth - month over month growth in stars.
Activity is a relative number indicating how actively a project is being developed. Recent commits have higher weight than older ones.
For example, an activity of 9.0 indicates that a project is amongst the top 10% of the most actively developed projects that we are tracking.
react-final-form
-
21 Best React Component Libraries To Try In 2021
import React from "react"; import ReactDOM from "react-dom"; import useForm from "react-hook-form"; import "./styles.css"; // Messages const required = "This field is required"; const maxLength = "Your input exceed maximum length"; // Error Component const errorMessage = error => { return {error}; }; export default function App() { const { register, handleSubmit, errors } = useForm(); const onSubmit = data => console.log(data); return ( React Hook Form {errors.Username && errors.Username.type === "required" && errorMessage(required)} {errors.Username && errors.Username.type === "maxLength" && errorMessage(maxLength)} {errors.Name && errors.Name.type === "required" && errorMessage(required)} {errors.Name && errors.Name.type === "maxLength" && errorMessage(maxLength)} {errors.MobileNumber && errors.MobileNumber.type === "maxLength" && errorMessage(maxLength)} {errors.Email && errors.Email.type === "required" && errorMessage(required)} {errors.Password && errors.Password.type === "required" && errorMessage(required)} Gender Male Female {errors.DateofBirth && errorMessage("Please use the following format MM/DD/YYYY")}
By clicking this, you are agreeing to our terms & services.); } const rootElement = document.getElementById("root"); ReactDOM.render(, rootElement);Enter fullscreen mode Exit fullscreen modeOutput

9. Redux

When it comes to state management libraries, the one that comes to our mind is Redux. Redux also comes under the category of best component libraries with 20.9k GitHub stars and 3k forks. Although it is meant to be used with the library components of React UI, you can also use it with Vue, Angular, Ember, and other JS frameworks.
Redux helps to connect React components to pieces of state by decreasing the need for props or callbacks. The library is often termed as a developer’s best friend. It helps you to write consistent codes and is environment-friendly. You can also edit the code while your app is live. React Native has an official Redux library — React-Redux.
Installation
npm install @reduxjs/toolkitEnter fullscreen mode Exit fullscreen modeExample
import React from "react";
    import { render } from "react-dom";
    import { Provider } from "react-redux";

    import store from "./store";
    import Page from "./Page";

    const App = () => (


    );

    render(, document.getElementById("root"));
Enter fullscreen mode Exit fullscreen mode10. React 360
We live in the age of augmented and virtual reality. Nowadays, most businesses, especially retail or e-commerce, provide AR/VR experience to try out their product virtually. It would be pretty helpful if you could create an AR/VR experience in React, won’t it?
React 360 is yet another best React library to help you create VR and 360 experiences using React. Whatever you create runs smoothly on mobiles, desktop as well as VR devices. The goal of this library is to simplify the process of creating complex VR and 3D UI. Just like its predecessor, React VR, this library also boasts of providing an engaging experience to its users by using familiar concepts and tools.
Installation
Before installing the React 360, ensure you have NodeJS installed in your machine.
$ npm install -g react-360-cliEnter fullscreen mode Exit fullscreen modeExample
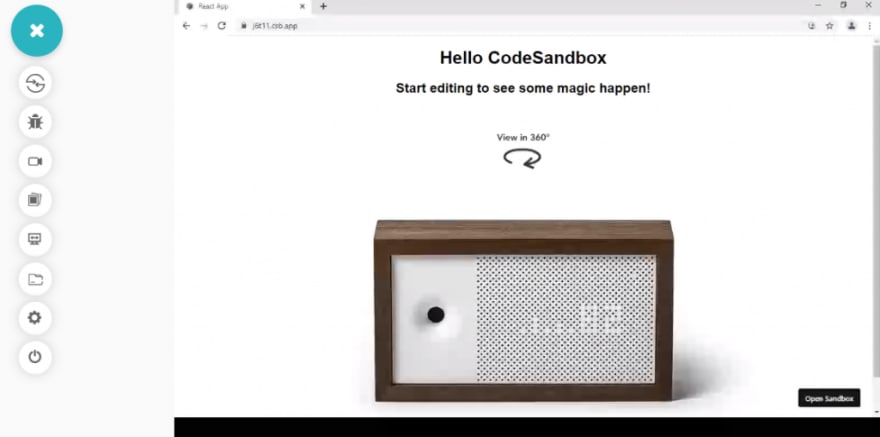
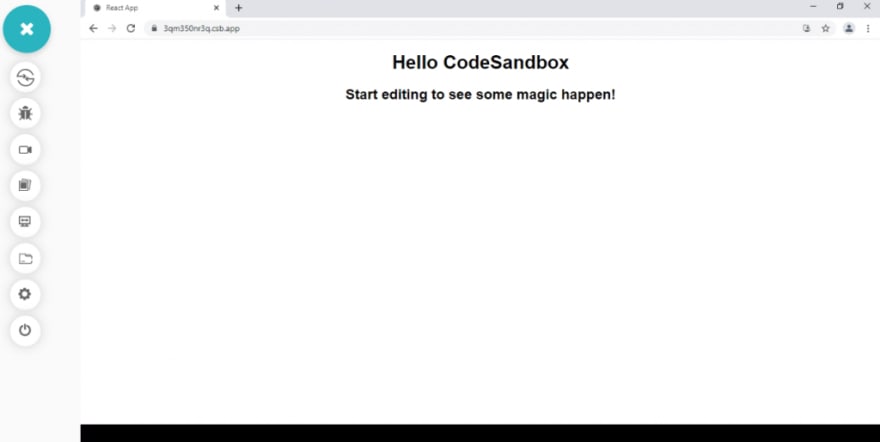
import React from "react"; import ReactDOM from "react-dom"; import React360 from "./React360"; import "./styles.css"; function App() { return (); } const rootElement = document.getElementById("root"); ReactDOM.render(, rootElement);Hello CodeSandbox
Start editing to see some magic happen!
}) Enter fullscreen mode Exit fullscreen mode
Enter fullscreen mode Exit fullscreen modeOutput
11. FABRICS React

Developed by Microsoft, Fabrics React is among the best component libraries that provide an MS Office-like experience. The components that you will find in Fabrics React are developed using the latest frameworks like SASS, ES6, and Webpack. All of the components are simplistic in design, thus making them easier to use.
Developers can use them by easily integrating with libraries like redux-form. You can use the library on all platforms like mobile, laptop, desktop, and even Office365 or OneNote. The FABRIC core is a set of SASS components combined with CSS classes, allowing access to various colors, animations, etc.
Installation
$ npm install --save react-fabricEnter fullscreen mode Exit fullscreen modeExample
import React from 'react' import { render } from 'react-dom' import 'fabric-webpack' import DesignCanvas from './DesignCanvas' import Rect from './Rect' import Circle from './Circle' import Image from './Image' const App = () => () render(, document.getElementById('root'))Enter fullscreen mode Exit fullscreen mode12. React Virtualized
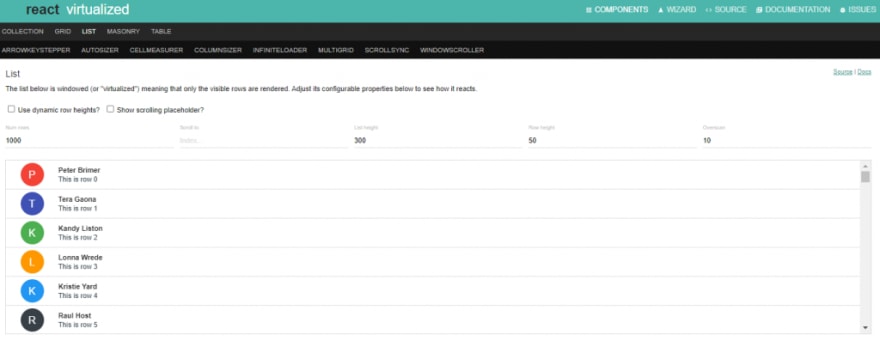
React Virtualized is among the best React grid libraries that target specific aspects of a user interface. With 21.6k GitHub stars and 2.7k forks, React Virtualized is developed for solving a single goal — render tables and list efficiently on your page. You may think that rendering a table is not that much difficult. Well, it is when your table has thousands of elements. The library is trying to tackle this kind of exceptional case.
In addition, web developers can add various JavaScript-based usability features to their interfaces, such as an infinite loader, window scroller, arrow key stepper, cell measurer, auto sizer, and so on.
Installation
npm install react-virtualized --saveEnter fullscreen mode Exit fullscreen modeExample
import React from 'react'; import { render } from 'react-dom'; import UserForm from './UserForm'; const imaginaryUser = { email: '', username: '', imaginaryThingId: null, }; const App = () => (); render(, document.getElementById('root'));Enter fullscreen mode Exit fullscreen mode13. React Desktop
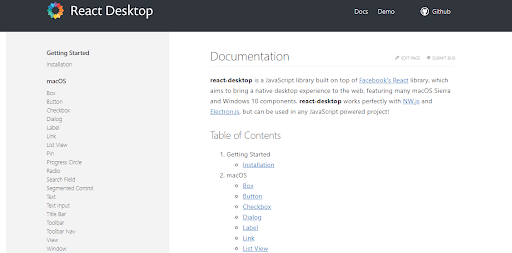
React Desktop is a JavaScript-based and library built on React. The goal of this library is to bring the experience of using a native desktop on the web. It supports multiple windows and macOS components like Checkbox, dialogue, radio, nav pane, etc. The library has a rating of more than 8k stars on GitHub.
React Desktop is one of the best React libraries to create web apps that help to provide various javascript Developers can effectively replicate the user interface provided by both Windows and macOS by using the UI components from the React Desktop library. It facilitates a streamlined process from a native desktop application to a web application.
Installation
npm install react-desktop --saveEnter fullscreen mode Exit fullscreen modeExample
import React from "react";
    import { Button, TitleBar, Toolbar, SearchField } from "react-desktop/macOs";
    import "./styles.css";

    export default function App() {
      return (
        <>


     console.log("Clicked!")}>
            Press me!


      );
    }
Enter fullscreen mode Exit fullscreen mode14. Chakra UI
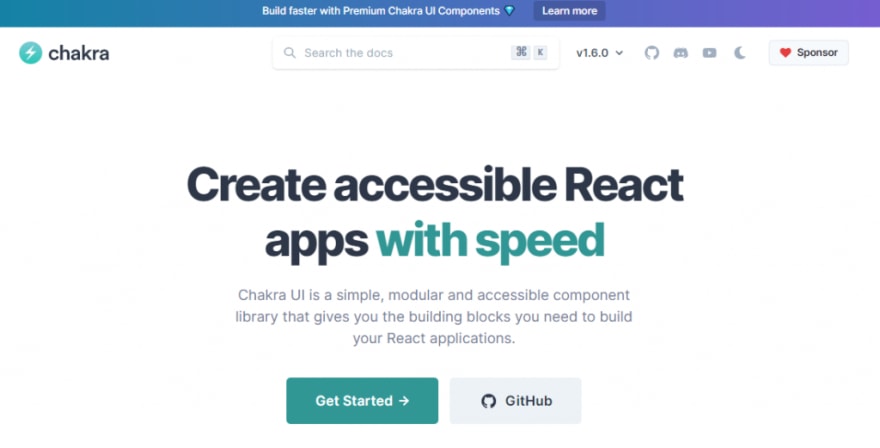
Chakra UI is a React component library that aims for developers to spend less time in writing codes and more time building a great user experience for the users. It gives you modular, accessible, and simple UI components that you need for building apps.
The components are accessible and follow WAI-ARIA standards.
You can customize the components easily to match your design specs.
You will have both light and dark UI themes. The components are designed with composition as the primary goal. You can create new components easily.
The community of Chakra UI is very active. You will get all the help required whenever you feel stuck.
Installation
npm i @chakra-ui/react @emotion/react @emotion/styled framer-motionEnter fullscreen mode Exit fullscreen modeExample
import React from "react"; import ReactDOM from "react-dom"; import Header from "./header"; import { theme, ThemeProvider, CSSReset } from "[@chakra](http://twitter.com/chakra)-ui/core"; const breakpoints = ["360px", "768px", "1024px", "1440px"]; breakpoints.sm = breakpoints[0]; breakpoints.md = breakpoints[1]; breakpoints.lg = breakpoints[2]; breakpoints.xl = breakpoints[3]; const newTheme = { ...theme, breakpoints }; function App() { return (); } const rootElement = document.getElementById("root"); ReactDOM.render(, rootElement);Enter fullscreen mode Exit fullscreen mode15. React Final Form

React Final Form is yet another best React component library. It is a subscription-based library for the state of form management in React. The library was designed to be modular. When your signup form has just a few fields, why do you need to download a large and complex code that is meant for handling hundreds of fields?
The developer just needs to put some pieces together and create a customized library based on their requirements. A developer should worry about bundle size if he thinks of performance. React final form provides a lean solution of form management with a library that occupies only 5.4kb. It offers hooks API so that you can flexibly compose the features of your form. The best feature of this library is, the form elements get notified whenever there is some change in the form’s state.
Installation
Via npm
npm install --save final-form react-final-formEnter fullscreen mode Exit fullscreen modeExample
import React from 'react' import { render } from 'react-dom' import Styles from './Styles' import { Form, Field } from 'react-final-form' const sleep = ms => new Promise(resolve => setTimeout(resolve, ms)) const onSubmit = async values => { await sleep(300) window.alert(JSON.stringify(values, 0, 2)) } const App = () => (🏁 React Final Form - Simple Example
Read Docs (First NameLast NameFavorite Color ❤️ Red 💚 Green 💙 BlueToppings 🐓 Chicken 🐷 Ham 🍄 MushroomsNotesSubmit Reset{JSON.stringify(values, 0, 2)})} /> ) render(, document.getElementById("root"));Enter fullscreen mode Exit fullscreen modeOutput

16. Styled Components
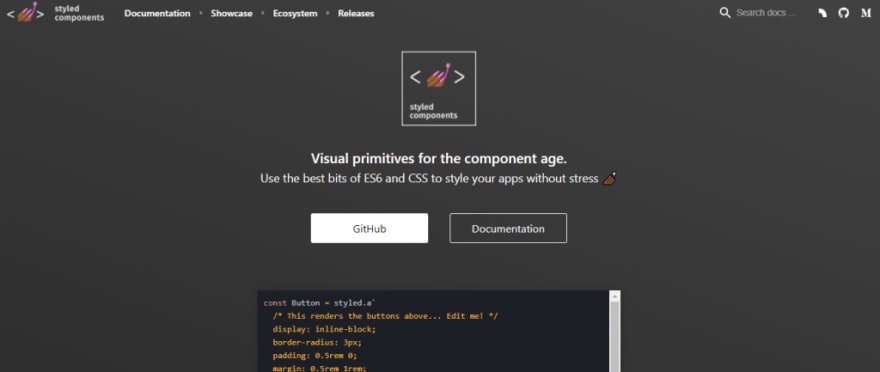
If you are using traditional CSS in your React app, you may often face problems by accidentally overwriting a selector that you have used at another place.
Styled Components is one of the best React libraries that help you to organize your project. You can build reusable components to customize the look of your app. And the issue that we discussed earlier? You can avoid that by directly using a CSS syntax inside your components. The library is quite popular and used by popular sites like IMDb, Reddit, Vimeo, Coinbase, and many others.
Installation
npm i styled-componentsEnter fullscreen mode Exit fullscreen modeExample
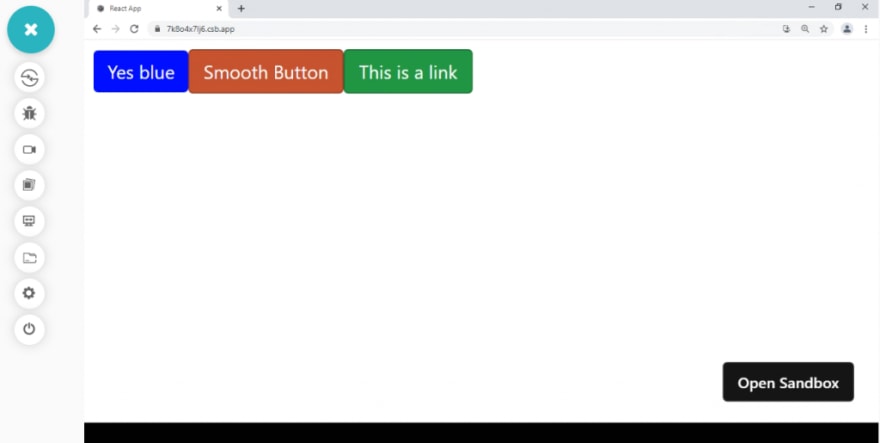
import React from "react"; import { render } from "react-dom"; import { Button, th } from "smooth-ui"; import { darken } from "polished"; // Simple extend const BlueButton = Button.extend` background-color: blue !important; color: white !important; `; // Use props & theme in extend const BorderedButton = Button.extend` border: 1px solid ${props => th(props.variant, color => darken(0.1, color))}; &:hover { border-color: ${props => th(props.variant, color => darken(0.3, color))}; } `; // Modify component const LinkBorderedButton = BorderedButton.withComponent("a"); const App = () => (Yes blue Smooth Button This is a link); render(, document.getElementById("root"));Enter fullscreen mode Exit fullscreen modeOutput
17. OnsenUI

Nowadays, almost all companies work with developing cross-browser compatible mobile apps. If you are an app developer who has often faced the pain of dealing with device or OS-compatible issues, you should be interested in OnsenUI.
OnSenUI is yet another best component library for React that uses JavaScript and HTML5 and integrates with React, Vue, and Angular. The components get styled automatically based on the platform. It means a single source code works in both Android and iOS. Although the collection of elements use pure CSS, there are custom elements for helping you out if you want some more detailing.
Installation
npm install onsenuiEnter fullscreen mode Exit fullscreen modeExample
import React from "react"; import { render } from "react-dom"; import ons from "onsenui"; import { Splitter, SplitterSide, SplitterContent, Page, Toolbar, ToolbarButton, Icon } from "react-onsenui"; class MyPage extends React.Component { state = { isOpen: false }; hide=()=> { this.setState({ isOpen: false }); } show = () => { this.setState({ isOpen: true }); } renderToolbar() { return (My app!); } render() { return (Swipe right to open the menu.
); } } render(, document.getElementById("root"));Enter fullscreen mode Exit fullscreen modeOutput

18. Enzyme
We have Jasmine or Karma for testing JavaScript or Angular. A library dedicated to testing React apps would be great. Enzyme is among the best React libraries that allows you to manipulate, transverse, and simulate the output of React components so that you achieve the desired result. Unlike other testing libraries, it is more straightforward and valuable.
It has the power to mimic jQuery API and DOM, thus more flexible and intuitive. Enzyme also offers a unique API known as Shallow Rendering API. This API allows you to test only the components that you feel to be necessary as per your requirement. Thus ensuring that your application is not overloaded by testing multiple components at any point in time.
Installation
npm i --save-dev enzyme enzyme-adapter-react-16Enter fullscreen mode Exit fullscreen modeExample
import React from "react"; import ReactDOM from "react-dom"; import "./styles.css"; function App() { return (); } const rootElement = document.getElementById("root"); ReactDOM.render(, rootElement);Hello CodeSandbox
Start editing to see some magic happen!
Enter fullscreen mode Exit fullscreen modeOutput
19. React Admin

With over 12k stars on GitHub, React Admin is also considered one of the best React libraries to use if you are developing B2B admin apps based on GraphQL or REST API. The library allows you to customize the design of such apps. It is built with a collection of well-known libraries like Material UI, Redux, and React Router.
Although developers mostly use the free version, React Admin also has an enterprise version. The enterprise version provides professional support from the creators, along with access to specific components of private modules.
Installation
npm install react-adminEnter fullscreen mode Exit fullscreen modeExample
import * as React from 'react';
    import PostIcon from '[@material](http://twitter.com/material)-ui/icons/Book';
    import UserIcon from '[@material](http://twitter.com/material)-ui/icons/Group';
    import { Admin, Resource, ListGuesser } from 'react-admin';
    import jsonServerProvider from 'ra-data-json-server';

    import { PostList, PostEdit, PostCreate, PostShow } from './posts';
    import { UserList } from './users';
    import Dashboard from './Dashboard';
    import authProvider from './authProvider';

    const App = () => (


    );
    export default App;
Enter fullscreen mode Exit fullscreen mode20. React Toolbox

React Toolbox is a collection of React components that work by implementing Google’s material design. Powered by CSS, the library integrates with your webpack workflow., apart from giving you the liberty of using any other module binder.
While working with this library, you can import the components in bundles, or, if you want to skip importing unwanted bundles or CSS, you can import them in raw form.
Installation
$ npm install --save react-toolboxEnter fullscreen mode Exit fullscreen modeExample
import React from "react" import { render } from "react-dom" import ThemeProvider from "react-toolbox/lib/ThemeProvider" import markdownToReact from "./markdownToReact" import theme from "./assets/react-toolbox/theme" import "./assets/react-toolbox/theme.css" const content = markdownToReact( `# Hello !Icon[add](Add){ floating accent } !Icon[bookmark](Bookmark){ raised primary label="Bookmark" }` ) const styles = { fontFamily: "sans-serif", textAlign: "center", } const App = () => ({ content }) render(, document.getElementById('root'))Enter fullscreen mode Exit fullscreen mode21. React Suite
React developers prefer a library that is designed not only for UI but also backend and middle platforms. React Suite is also considered one of the best React libraries that provide those mentioned above all the necessary components to create an interactive app and a friendly experience for a developer.
The library supports all major browsers like Chrome, Edge, IE, Firefox, and Safari. However, IE 9 is no longer supported. Apart from cross-browser support, the library also supports server-side rendering. If you are using React suite, you will get the support of Next.js for building web apps.
Installation
npm i rsuite@next --saveEnter fullscreen mode Exit fullscreen modeExample
import React from "react"; import { render } from "react-dom"; import { Button } from "rsuite"; const styles = { padding: 20, textAlign: "center" }; const App = () => (Hello World); render(, document.getElementById("root"));Enter fullscreen mode Exit fullscreen modeOutput
url-encode - URL encoding provides a way to convert special characters into a format that can be sent over the Internet.
Wrapping Up!
Once you’ve developed the application with any of the above-mentioned frameworks, you can perform browser compatibility testing of your web application to check whether it renders correctly across different browsers and operating systems. LambdaTest is a cloud-based testing tool that enables you to test your website across 3000+ browsers and OS combinations.
You can also perform mobile responsive testing of your website to check its responsive web design. LT Browser is a developer-friendly tool that lets you check your website across 50+ pre-built device viewports for mobiles, tablets, desktops, and even laptops.
That’s all from our side. Although there are multiple other React libraries that developers find helpful, we have discussed the best ones. Also, let us know if you have used any other library that surpasses the usability of the ones mentioned in the list. We hope you had a pleasant experience reading this blog, and it proves to be valuable for any React developer.
NodeJs-Cucumber-Selenium
-
Top 28 Selenium WebDriver Commands in NUnit For Test Automation
/*Selenium Webdriver command to check whether a particular web element is displayed */ driver = new ChromeDriver(); driver.Url = "https://www.lambdatest.com"; /* The Xpath of the Login Button on LambdaTest homepage */ IWebElement web_element = driver.FindElement(By.XPath("//*[@id="navbarSupportedContent"]/ul/li[6]/a")); Boolean element_enabled = web_element.Displayed;
-
A list of SaaS, PaaS and IaaS offerings that have free tiers of interest to devops and infradev
lambdatest.com — Manual, visual, screenshot, and automated browser testing on selenium and cypress, free for Open Source
-
Pyppeteer Tutorial: The Ultimate Guide to Using Puppeteer with Python
import asyncio import pytest from pyppeteer.errors import PageError from urllib.parse import quote import json import os import sys from os import environ from pyppeteer import connect, launch # Documentation Link # https://miyakogi.github.io/pyppeteer/reference.html#dialog-class # Interesting reference question # https://stackoverflow.com/questions/75622322/ # why-dialog-popup-alert-doesnt-dismiss-as-they-claim-by-using-pyppeteer-class # Scenario Handling Alerts dialog_test_url = 'https://www.lambdatest.com/selenium-playground/javascript-alert-box-demo' # Locators for different elements # 0 - JS Alert # 1 - Confirm Box # 2 - Prompt Box loc_alert_arr = ['.my-30', '.py-20.ml-10 .btn', 'section:nth-of-type(3) div:nth-of-type(3) .btn'] test_message = 'LambdaTest is a great platform!' # Event event listener for handling JS alert dialog box def handle_js_dialog_box(dialog): asyncio.ensure_future(dialog.accept()) print(f"Dialog message: {dialog.message}") # Event event listener for handling confirm dialog box def handle_confirm_accept_dialog_box(dialog): asyncio.ensure_future(dialog.accept()) print(f"Dialog message: {dialog.message}") # Event event listener for handling confirm dialog box def handle_confirm_dismiss_dialog_box(dialog): asyncio.ensure_future(dialog.dismiss()) print(f"Dialog message: {dialog.message}") # Event event listener for handling prompt dialog box def handle_confirm_prompt_dialog_box(dialog): asyncio.ensure_future(dialog.accept(test_message)) print(f"Dialog message: {dialog.message}") @pytest.mark.asyncio @pytest.mark.order(1) async def test_handling_js_alerts(page): await page.goto(dialog_test_url) # Can be changed with non-blocking sleep await asyncio.sleep(1) page.on('dialog', handle_js_dialog_box) elem_alert = await page.querySelector(loc_alert_arr[0]) # Click on the located element await elem_alert.click() # Wait for the event loop to process events await asyncio.sleep(2) @pytest.mark.asyncio @pytest.mark.order(2) async def test_handling_confirm_accept_alerts(page): await page.goto(dialog_test_url) # Can be changed with non-blocking sleep await asyncio.sleep(1) page.on('dialog', handle_confirm_accept_dialog_box) # Confirm Alert elem_alert = await page.querySelector(loc_alert_arr[1]) # Click on the located element await elem_alert.click() # Wait for the event loop to process events await asyncio.sleep(2) @pytest.mark.asyncio @pytest.mark.order(3) async def test_handling_confirm_dismiss_alerts(page): await page.goto(dialog_test_url) # Can be changed with non-blocking sleep await asyncio.sleep(1) page.on('dialog', handle_confirm_dismiss_dialog_box) await asyncio.sleep(2) # Dismiss Alert elem_alert = await page.querySelector(loc_alert_arr[1]) # Click on the located element await elem_alert.click() # Wait for the event loop to process events await asyncio.sleep(2) @pytest.mark.asyncio @pytest.mark.order(4) async def test_handling_prompt_alerts(page): await page.goto(dialog_test_url) # Can be changed with non-blocking sleep await asyncio.sleep(1) page.on('dialog', handle_confirm_prompt_dialog_box) await asyncio.sleep(1) # Prompt Alert elem_alert = await page.querySelector(loc_alert_arr[2]) # Click on the located element await elem_alert.click() page.on('dialog', handle_confirm_dismiss_dialog_box) await asyncio.sleep(2)
-
How to Handle iFrames in Playwright
/** * Add the file in your test suite to run tests on LambdaTest. * Import 'test' object from this file in the tests. */ import * as base from "@playwright/test"; import path from "path"; import { chromium } from "@playwright/test" import dotenv from 'dotenv'; dotenv.config(); // LambdaTest capabilities const capabilities = { browserName: "Chrome", // Browsers allowed: 'Chrome', 'MicrosoftEdge', 'pw-chromium', 'pw-firefox' and 'pw-webkit' browserVersion: "latest", "LT:Options": { platform: "Windows 10", build: "Playwright TypeScript iframes", name: "Playwright TypeScript iframes", user: process.env.LT_USERNAME, accessKey: process.env.LT_ACCESS_KEY, network: true, video: true, console: true, tunnel: false, // Add tunnel configuration if testing locally hosted webpage tunnelName: "", // Optional geoLocation: "US", // country code can be fetched from https://www.lambdatest.com/capabilities-generator/ }, }; // Patching the capabilities dynamically according to the project name. const modifyCapabilities = (configName, testName) => { let config = configName.split("@lambdatest")[0]; let [browserName, browserVersion, platform] = config.split(":"); capabilities.browserName = browserName ? browserName : capabilities.browserName; capabilities.browserVersion = browserVersion ? browserVersion : capabilities.browserVersion; capabilities["LT:Options"]["platform"] = platform ? platform : capabilities["LT:Options"]["platform"]; capabilities["LT:Options"]["name"] = testName; }; const getErrorMessage = (obj, keys) => keys.reduce( (obj, key) => (typeof obj == "object" ? obj[key] : undefined), obj ); const test = base.test.extend({ page: async ({ page, playwright }, use, testInfo) => { // Configure LambdaTest platform for cross-browser testing let fileName = testInfo.file.split(path.sep).pop(); if (testInfo.project.name.match(/lambdatest/)) { modifyCapabilities( testInfo.project.name, '${testInfo.title} - ${fileName}' ); const browser = await chromium.connect({ wsEndpoint: 'wss://cdp.lambdatest.com/playwright?capabilities=${encodeURIComponent( JSON.stringify(capabilities) )}', }); const ltPage = await browser.newPage(testInfo.project.use); await use(ltPage); const testStatus = { action: "setTestStatus", arguments: { status: testInfo.status, remark: getErrorMessage(testInfo, ["error", "message"]), }, }; await ltPage.evaluate(() => {}, 'lambdatest_action: ${JSON.stringify(testStatus)}'); await ltPage.close(); // await browser.close(); } else { // Run tests in local in case of local config provided await use(page); } }, }); export default test;
-
How To Use Playwright How To Use Playwright For Web Scraping with Python
import json import logging import os import subprocess import sys import time import urllib from logging import getLogger from dotenv import load_dotenv from playwright.sync_api import sync_playwright # setup basic logging for our project which will display the time, log level & log message logger = getLogger("webscapper.py") logging.basicConfig( stream=sys.stdout, # uncomment this line to redirect output to console format="%(message)s", level=logging.DEBUG, ) # LambdaTest username & access key are stored in an env file & we fetch it from there using python dotenv module load_dotenv("sample.env") capabilities = { "browserName": "Chrome", # Browsers allowed: `Chrome`, `MicrosoftEdge`, `pw-chromium`, `pw-firefox` and `pw-webkit` "browserVersion": "latest", "LT:Options": { "platform": "Windows 10", "build": "E Commerce Scrape Build", "name": "Scrape Lambda Software Product", "user": os.getenv("LT_USERNAME"), "accessKey": os.getenv("LT_ACCESS_KEY"), "network": False, "video": True, "console": True, "tunnel": False, # Add tunnel configuration if testing locally hosted webpage "tunnelName": "", # Optional "geoLocation": "", # country code can be fetched from https://www.lambdatest.com/capabilities-generator/ }, } def main(): with sync_playwright() as playwright: playwright_version = ( str(subprocess.getoutput("playwright --version")).strip().split(" ")[1] ) capabilities["LT:Options"]["playwrightClientVersion"] = playwright_version lt_cdp_url = ( "wss://cdp.lambdatest.com/playwright?capabilities=" + urllib.parse.quote(json.dumps(capabilities)) ) logger.info(f"Initiating connection to cloud playwright grid") browser = playwright.chromium.connect(lt_cdp_url) # comment above line & uncomment below line to test on local grid # browser = playwright.chromium.launch(headless=False) page = browser.new_page() try: # section to navigate to software category page.goto("https://ecommerce-playground.lambdatest.io/") page.get_by_role("button", name="Shop by Category").click() page.get_by_role("link", name="Software").click() page_to_be_scrapped = page.get_by_role( "combobox", name="Show:" ).select_option( "https://ecommerce-playground.lambdatest.io/index.php?route=product/category&path=17&limit=75" ) page.goto(page_to_be_scrapped[0]) # Since image are lazy-loaded scroll to bottom of page # the range is dynamically decided based on the number of items i.e. we take the range from limit # https://ecommerce-playground.lambdatest.io/index.php?route=product/category&path=17&limit=75 for i in range(int(page_to_be_scrapped[0].split("=")[-1])): page.mouse.wheel(0, 300) i += 1 time.sleep(0.1) # Construct locators to identify name, price & image base_product_row_locator = page.locator("#entry_212408").locator(".row").locator(".product-grid") product_name = base_product_row_locator.get_by_role("heading") product_price = base_product_row_locator.locator(".price-new") product_image = ( base_product_row_locator.locator(".carousel-inner") .locator(".active") .get_by_role("img") ) total_products = base_product_row_locator.count() for product in range(total_products): logger.info( f"\n**** PRODUCT {product+1} ****\n" f"Product Name = {product_name.nth(product).all_inner_texts()[0]}\n" f"Price = {product_price.nth(product).all_inner_texts()[0]}\n" f"Image = {product_image.nth(product).get_attribute('src')}\n" ) status = 'status' remark = 'Scraping Completed' page.evaluate("_ => {}","lambdatest_action: {\"action\": \"setTestStatus\", \"arguments\": {\"status\":\"" + status + "\", \"remark\": \"" + remark + "\"}}") except Exception as ex: logger.error(str(ex)) if __name__ == "__main__": main()
-
How to Use @FindBy Annotation in Selenium Java
public class SeleniumPlaygroundTests extends BaseTest { @Test public void testMenus() { this.driverManager.getDriver().get("https://www.lambdatest.com/selenium-playground/"); final var mainPage = new MainPage(this.driverManager.getDriver()); assertEquals(mainPage.menuListSize(), 37); }
-
Exception Handling In Cypress: A Comprehensive Guide
Tired of manually creating JSON data? Generate random JSON data in seconds with our easy-to-use tool. Try it now and make your development process a breeze: https://www.lambdatest.com/free-online-tools/random-json-generator
-
Perform Easy Cross Browser Testing With LambdaTest WordPress Plugin
To see, how it works step by step refer to our tutorial on using LambdaTest’s WordPress Plugin for cross browser testing.
-
How To Use Arrays.asList() In Java [With Examples]
import java.util.Arrays; import java.util.List; import java.net.MalformedURLException; import java.net.URL; import org.openqa.selenium.remote.DesiredCapabilities; import org.openqa.selenium.remote.RemoteWebDriver; import org.openqa.selenium.chrome.ChromeDriver; import org.openqa.selenium.edge.EdgeDriver; import org.openqa.selenium.firefox.FirefoxDriver; public class DriverManager { private RemoteWebDriver driver; public static void init_driver(String browser) throws MalformedURLException { String username = System.getenv("LT_USERNAME") == null ? "Your LT Username" : System.getenv("LT_USERNAME"); String authkey = System.getenv("LT_ACCESS_KEY") == null ? "Your LT AccessKey" : System.getenv("LT_ACCESS_KEY"); // Create a list of browsers List browsers = Arrays.asList("chrome", "firefox", "edge"); // Loop through the list of browsers and create a driver instance for each one for (String browserName : browsers) { if (browser.equalsIgnoreCase("chrome")) { //To launch the chrome browser on local /*driver = new ChromeDriver();*/ //Setting chrome capabilities DesiredCapabilities ChromeCaps = new DesiredCapabilities(); ChromeCaps.setCapability("platform", "Windows 10"); ChromeCaps.setCapability("browserName", "chrome"); ChromeCaps.setCapability("version", "latest"); ChromeCaps.setCapability("build", "TestNG With Java"); ChromeCaps.setCapability("name", m.getName() + this.getClass().getName()); ChromeCaps.setCapability("plugin", "git-testng"); //To launch the chrome browser on LambdaTest cloud grid String[] Tags = new String[]{"Feature", "Magicleap", "Severe"}; ChromeCaps.setCapability("tags", Tags); driver = new RemoteWebDriver(new URL("https://" + username + ":" + authkey + hub), ChromeCaps); } else if (browser.equalsIgnoreCase("firefox")) { //To launch the firefox browser on local /*driver = new FirefoxDriver();*/ //Setting firefox capabilities DesiredCapabilities FirefoxCaps = new DesiredCapabilities(); FirefoxCaps.setCapability("platform", "Windows 10"); FirefoxCaps.setCapability("browserName", "firefox"); FirefoxCaps.setCapability("version", "114.0"); FirefoxCaps.setCapability("build", "TestNG With Java"); FirefoxCaps.setCapability("name", m.getName() + this.getClass().getName()); FirefoxCaps.setCapability("plugin", "git-testng"); //To launch the firefox browser on LambdaTest cloud grid String[] Tags = new String[]{"Feature", "Magicleap", "Severe"}; FirefoxCaps.setCapability("tags", Tags); driver = new RemoteWebDriver(new URL("https://" + username + ":" + authkey + hub), FirefoxCaps); } else if (browser.equalsIgnoreCase("edge")) { //To launch the edge browser on local /*driver = new EdgeDriver();*/ //Setting edge capabilities DesiredCapabilities EdgeCaps = new DesiredCapabilities(); EdgeCaps.setCapability("platform", "Windows 10"); EdgeCaps.setCapability("browserName", "edge"); EdgeCaps.setCapability("version", "112.0"); EdgeCaps.setCapability("build", "TestNG With Java"); EdgeCaps.setCapability("name", m.getName() + this.getClass().getName()); EdgeCaps.setCapability("plugin", "git-testng"); //To launch the edge browser on LambdaTest cloud grid String[] Tags = new String[]{"Feature", "Magicleap", "Severe"}; EdgeCaps.setCapability("tags", Tags); driver = new RemoteWebDriver(new URL("https://" + username + ":" + authkey + hub), EdgeCaps); } else { throw new IllegalArgumentException("Invalid browser name: " + browser); } // Use the driver instance to navigate to a webpage and perform some actions driver.get("https://www.lambdatest.com"); System.out.println(driver.getTitle()); // Close the driver instance driver.quit(); } } }
-
How To Download And Setup Edge Driver For Selenium
from selenium import webdriver from selenium.webdriver.edge.service import Service # Driver Code if __name__ == '__main__': # create service object edgeService = Service( r"D:\\Lambdatest Tools\\edgedriver_win64\\msedgedriver.exe") # create webdriver object edgeDriver = webdriver.Edge(service=edgeService) # open browser and navigate to the website edgeDriver.get('https://www.lambdatest.com')
What are some alternatives?
rebass - :atom_symbol: React primitive UI components built with styled-system.
vite - Next generation frontend tooling. It's fast!
redux-form - A Higher Order Component using react-redux to keep form state in a Redux store [Moved to: https://github.com/redux-form/redux-form]
spring-boot-data-H2-embedded - Spring Boot Demo App with H2 In Memory Database
react-advanced-form - Functional reactive forms. Multi-layer validation, custom styling, field grouping, reactive props, and much more.
MSTest - MSTest framework and adapter
serverless-forms - NodeJS app to send form submissions by email
animator - Design tool for creating Lottie animations and interactive web components
redux-form - A Higher Order Component using react-redux to keep form state in a Redux store
responsively-app - A modified web browser that helps in responsive web development. A web developer's must have dev-tool.
final-form - 🏁 Framework agnostic, high performance, subscription-based form state management
geckodriver - WebDriver for Firefox