 Our great sponsors
-
- Fabric.Image
- Fabric.Image.fromURL
- BaseFilter
- Brightness
- convolute
- GradientTransparency
- Grayscale
- Invert
- Mask
- Noise
- Pixelate
- RemoveWhite
- Sepia
- Sepia2
- Tint
-
SurveyJS
Open-Source JSON Form Builder to Create Dynamic Forms Right in Your App. With SurveyJS form UI libraries, you can build and style forms in a fully-integrated drag & drop form builder, render them in your JS app, and store form submission data in any backend, inc. PHP, ASP.NET Core, and Node.js.

body{ display:flex; flex-direction:column; align-items:center; }
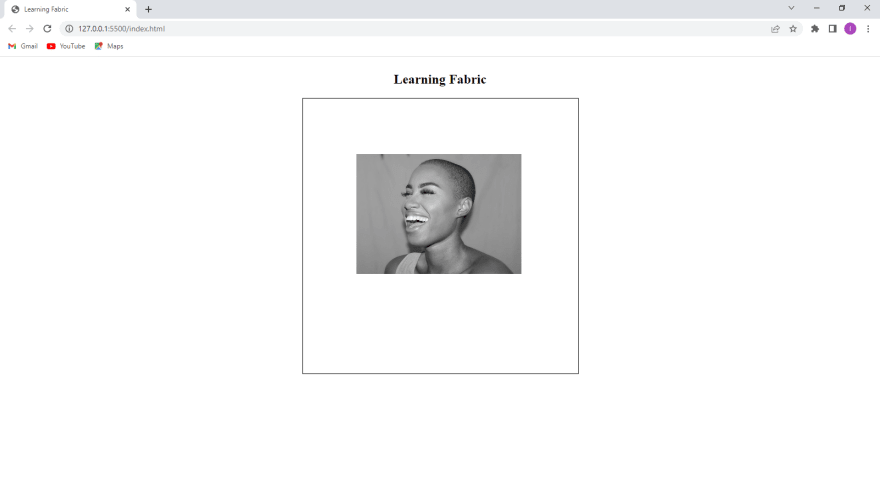
Learning Fabric
Enter fullscreen mode Exit fullscreen modeNext, we initiate a Canvas instance in our script tag:
Syntax
new fabric.Canvas(element: HTMLElement|String, options: Object)Enter fullscreen mode Exit fullscreen modeThis allows Fabric.js to create this class instance so that we can use the provided methods of Fabric.js:
const canvas = new fabric.Canvas("canvas", {})Enter fullscreen mode Exit fullscreen modeNow, we’ll go ahead and give our canvas different properties, such as width, height, and background color:
const canvas = new fabric.Canvas("canvas", {
 width:500,
 height:500,
 backgroundColor:green
})
Enter fullscreen mode Exit fullscreen modeOutput
Creating a Rectangle with Fabric.js
Now that we’ve initialized a canvas and given it various properties, we’re going to create a rectangle using the Fabric.js object fabric.Rect:
Syntax
new fabric.Rect({object})Enter fullscreen mode Exit fullscreen modeHere the object houses the rectangle properties:
const canvas = new fabric.Canvas("canvas", {
 width:500,
 height:500,
 backgroundColor:green
});

const rectangle = new fabric.Rect({
 width:200,
 height:200,
 /* fill is used to define the background color*/
    fill:'red'
})
/*the add method is used to add objects to the canvas element */
canvas.add(rectangle)
/*the renderAll method used to render the canvas*/
canvas.renderAll();
Enter fullscreen mode Exit fullscreen modeThe
add()method is used to add objects to the Canvas element. In this case, it adds the rectangle we created to the canvas:Output
Creating a Circle
In the same way, we’ll create a circle. This time, we’ll use fabric.Circle:
const canvas = new fabric.Canvas("canvas", {
 width:500,
 height:500,
 backgroundColor:"lightgray"
});

const circle = new fabric.Circle({
 radius:60,
 fill:"blue"
})
canvas.add(circle);
canvas.renderALl();
Enter fullscreen mode Exit fullscreen modeOutput
With the above steps, we created a rectangle and a circle using Fabric.js. Note how interactive the objects are! Next, we’ll discuss images in Fabric.js.
Images with Fabric
The Fabric.Image is a Fabric.js object used to render images on a canvas. With Fabric.js, we can interact with the image. Images can be added to our canvas in two ways:
Using the Fabric.Image constructor requires us to create an image element in our HTML and then insert it into the constructor:
Syntax
fabric.Image(image_element)Enter fullscreen mode Exit fullscreen modeHTML
 Enter fullscreen mode Exit fullscreen mode
JS
const image_element = document.querySelector('#image');
const image = new fabric.Image(image_element)
canvas.add(image);
canvas.renderAll();
Enter fullscreen mode Exit fullscreen modeHowever, Fabric.Image.fromURL requires only the image URL (the URL can be retrieved from a website or your local folder), and is simpler than the former:
fabric.Image.fromURL(URL, function());Enter fullscreen mode Exit fullscreen modeAfter passing the URL, the callback function after the image is loaded. The first default parameter of the callback function is the fabric.Image object. Now, we can modify the image properties and then add it to the canvas:
const canvas = new fabric.Canvas("canvas", {
 width:500,
 height:500,
 backgroundColor:"White"
});

fabric.Image.fromURL('my_image.png',(img) => {
 // the scaleToHeight property is use to set the image height
    img.scaleToHeight(250)
 // scaleToWidth is use to set the image width
    img.scaleToWidth(250)
    canvas.add(img)
})
canvas.renderAll()
Enter fullscreen mode Exit fullscreen modeOutput
Editing Images with Fabric.js
Now that we know how to insert an image into a canvas, we’ll look at other image objects like image filters.
Image Filters
Fabric.js provides us with built-in filters:
Every instance of
fabric.Imagehas the "filters" property, which is a simple array of filters. We can use the array method to perform any required operation, including removing filters (pop, slice, shift), adding filters (push, unshift, slice), and even combining multiple filters. When we callapplyFilters, any filter in the “filters” array will be applied one by one. Let’s use some of these filters:Syntax
new fabric.Image.filters
// after that you can add any filter of your choice
// Example
new fabric.Image.filters.Grayscale()
Enter fullscreen mode Exit fullscreen modefabric.Image.fromURL('my_image.png', (image) => { image.scaleToHeight(300) image.ScaleToWidth(300) // Creating filter const filter = new fabric.Image.filters.Grayscale() //push the filter instance to filters image.filter.push(filter) // apply filter image.applyFilters() //add image into canvas (it also re-render the canvas) canvas.add(image) },{crossOrigin: 'anonymous'}); canvas.renderAll();Enter fullscreen mode Exit fullscreen modeOutput
Above, we used the Grayscale filter; we can also apply other filters. All we have to do is simply change the filter, as shown in this example:
fabric.Image.fromURL('my_image.png', (image) => {
      image.scaleToHeight(300)
       image.ScaleToWidth(300)

 // creating filter
 const filter = new fabric.Image.filters.Sepia()

 //add filter
        image.filter.push(filter)

 // apply filter
         image.applyFilters()

 //add image into canvas (it also re-render the canvas)
         canvas.add(image)
},{crossOrigin: 'anonymous'});
canvas.renderAll();
Enter fullscreen mode Exit fullscreen modeOutput
Image Blending
Blending is mixing two or more images to create a new image. Fabric.js gives us this ability. Here, we’re going to use the image blending filter for our image:
Syntax
new fabric.Image.filters.BlendImage({
 // the image that we want to blend
          image:imageA,
 // blend mode (in this case we are using the 'add' mode)
          mode:'add',

 alpha:0.5
      });
Enter fullscreen mode Exit fullscreen modefabric.Image.fromURL('my_image.png', (imageA) => { imageA.scaleToWidth(350) imageA.scaleToHeight(350) canvas.add(imageA) // Blending filter filter = new fabric.Image.filters.BlendImage({ image:imageA, mode:'add', alpha:0.5 }); //Add the second image fabric.Image.fromURL('my_image2.png',(imageB) => { imageB.scaleToHeight(100), imageB.scaleToWidth(100), canvas.add(imageB) }, {crossOrigin:''}); imageA.filters.push(filter); imageA.applyFilters(canvas.renderAll.bind(canvas)); },{crossOrigin:''})Enter fullscreen mode Exit fullscreen modeOutput
Image Clipping
A very popular effect used today is image clipping, or rather image cropping, which is done to remove parts of an image that we don’t want. With Fabric.js, we can achieve this by using the
clipPathmethod.First, we have to create our own
clipPathusing any Fabric.js object. Then, we’ll assign it to theclipPathproperty of the object we want to clip. Here, we’ll use a circle object:
const clipPath = new fabric.Circle({
 radius:150,
 top:200,
 left:250,
 // The originY and originX helps to center the image and the clipPath
    originY:"center",
 originX:"center"
})
Enter fullscreen mode Exit fullscreen modeAfter that, we add it to the image that we want to clip using the filter method:
new fabric.Image.fromURL('my_image.png',(img) => {
  img.scaleToHeight(300)
  img.scaleToWidth(300)
 // positioning the image
  img.scale(o.5).set({top:50,left:100})
 // Clip Path
  clipPath = new fabric.Circle({
 radius:150,
 top:200,
 left:250,
 originY:"center",
 originX:"center"
    })
  canvas.add(img)
  canvas.clipPath = clipPath;
  });
canvas.renderAll();
Enter fullscreen mode Exit fullscreen modeOutput
Image Blurring
Like other image filters, the blur filter accepts objects because they can be adjusted. A practical example is changing the brightness of an image. You can apply other image filters without any additional configurations (like grayscale, invert, or sepia). Other image filters like brightness, pixelate, tint, and noise all operate in this way, too. However, the difference is that their values are not the same. The brightness filter's actual brightness level ranges from-1 (full black) to 1 (full white). The noise filter's value is between 0 and 1000. For the blur filter, the value ranges from 0 to 10.
Syntax
new fabric.Image.filters.Blur(object)Enter fullscreen mode Exit fullscreen modefabric.Image.fromURL('my_image.png', (image) => { image.scaleToHeight(300) image.ScaleToWidth(300) // Creating the blur filter const filter = new fabric.Image.filters.Blur({ blur:0.6 }) //push the filter instance to filters image.filter.push(filter) image.applyFilters() canvas.add(image) },{crossOrigin: 'anonymous'}); canvas.renderAll();Enter fullscreen mode Exit fullscreen modeOutput
Conclusion
In conclusion, Fabric.js gives us an awesome experience when working with Canvas. It also provides a lot of features, some of which we covered in this article. For full details on some of the Fabric.js objects, you can review its documentation here.


Related posts
- Show HN: Minard – Generate beautiful charts with natural language
- Show HN: My wife and I made a maze game
- Fun, Beautiful, Printable 'Story Cards' for Kids with Cloudflare AI
- A web crawler program for crawling Echarts official website examples implemented by Puppeter
- Implementing Bloom Effect with Mapbox and Three.js